

How it works
- New email only — Categorization starts with messages received after you turn it on. It does not reorganize older email already in your mailbox.
- One label per email — SuperIntern applies the single best matching label, keeping your inbox easy to scan.
- Your priorities decide ties — If an email matches more than one label, the label higher in your priority list wins.
- You control where it goes — Each label can keep matching email in your inbox, automatically archive it, or be turned off.
Email Categorization is separate from reply drafting. A label describes what an email is and where it belongs; your drafting settings decide whether SuperIntern writes a reply.
Open Email Categorization
Go to My Day → Emails, then select Categorization settings at the top of the email view.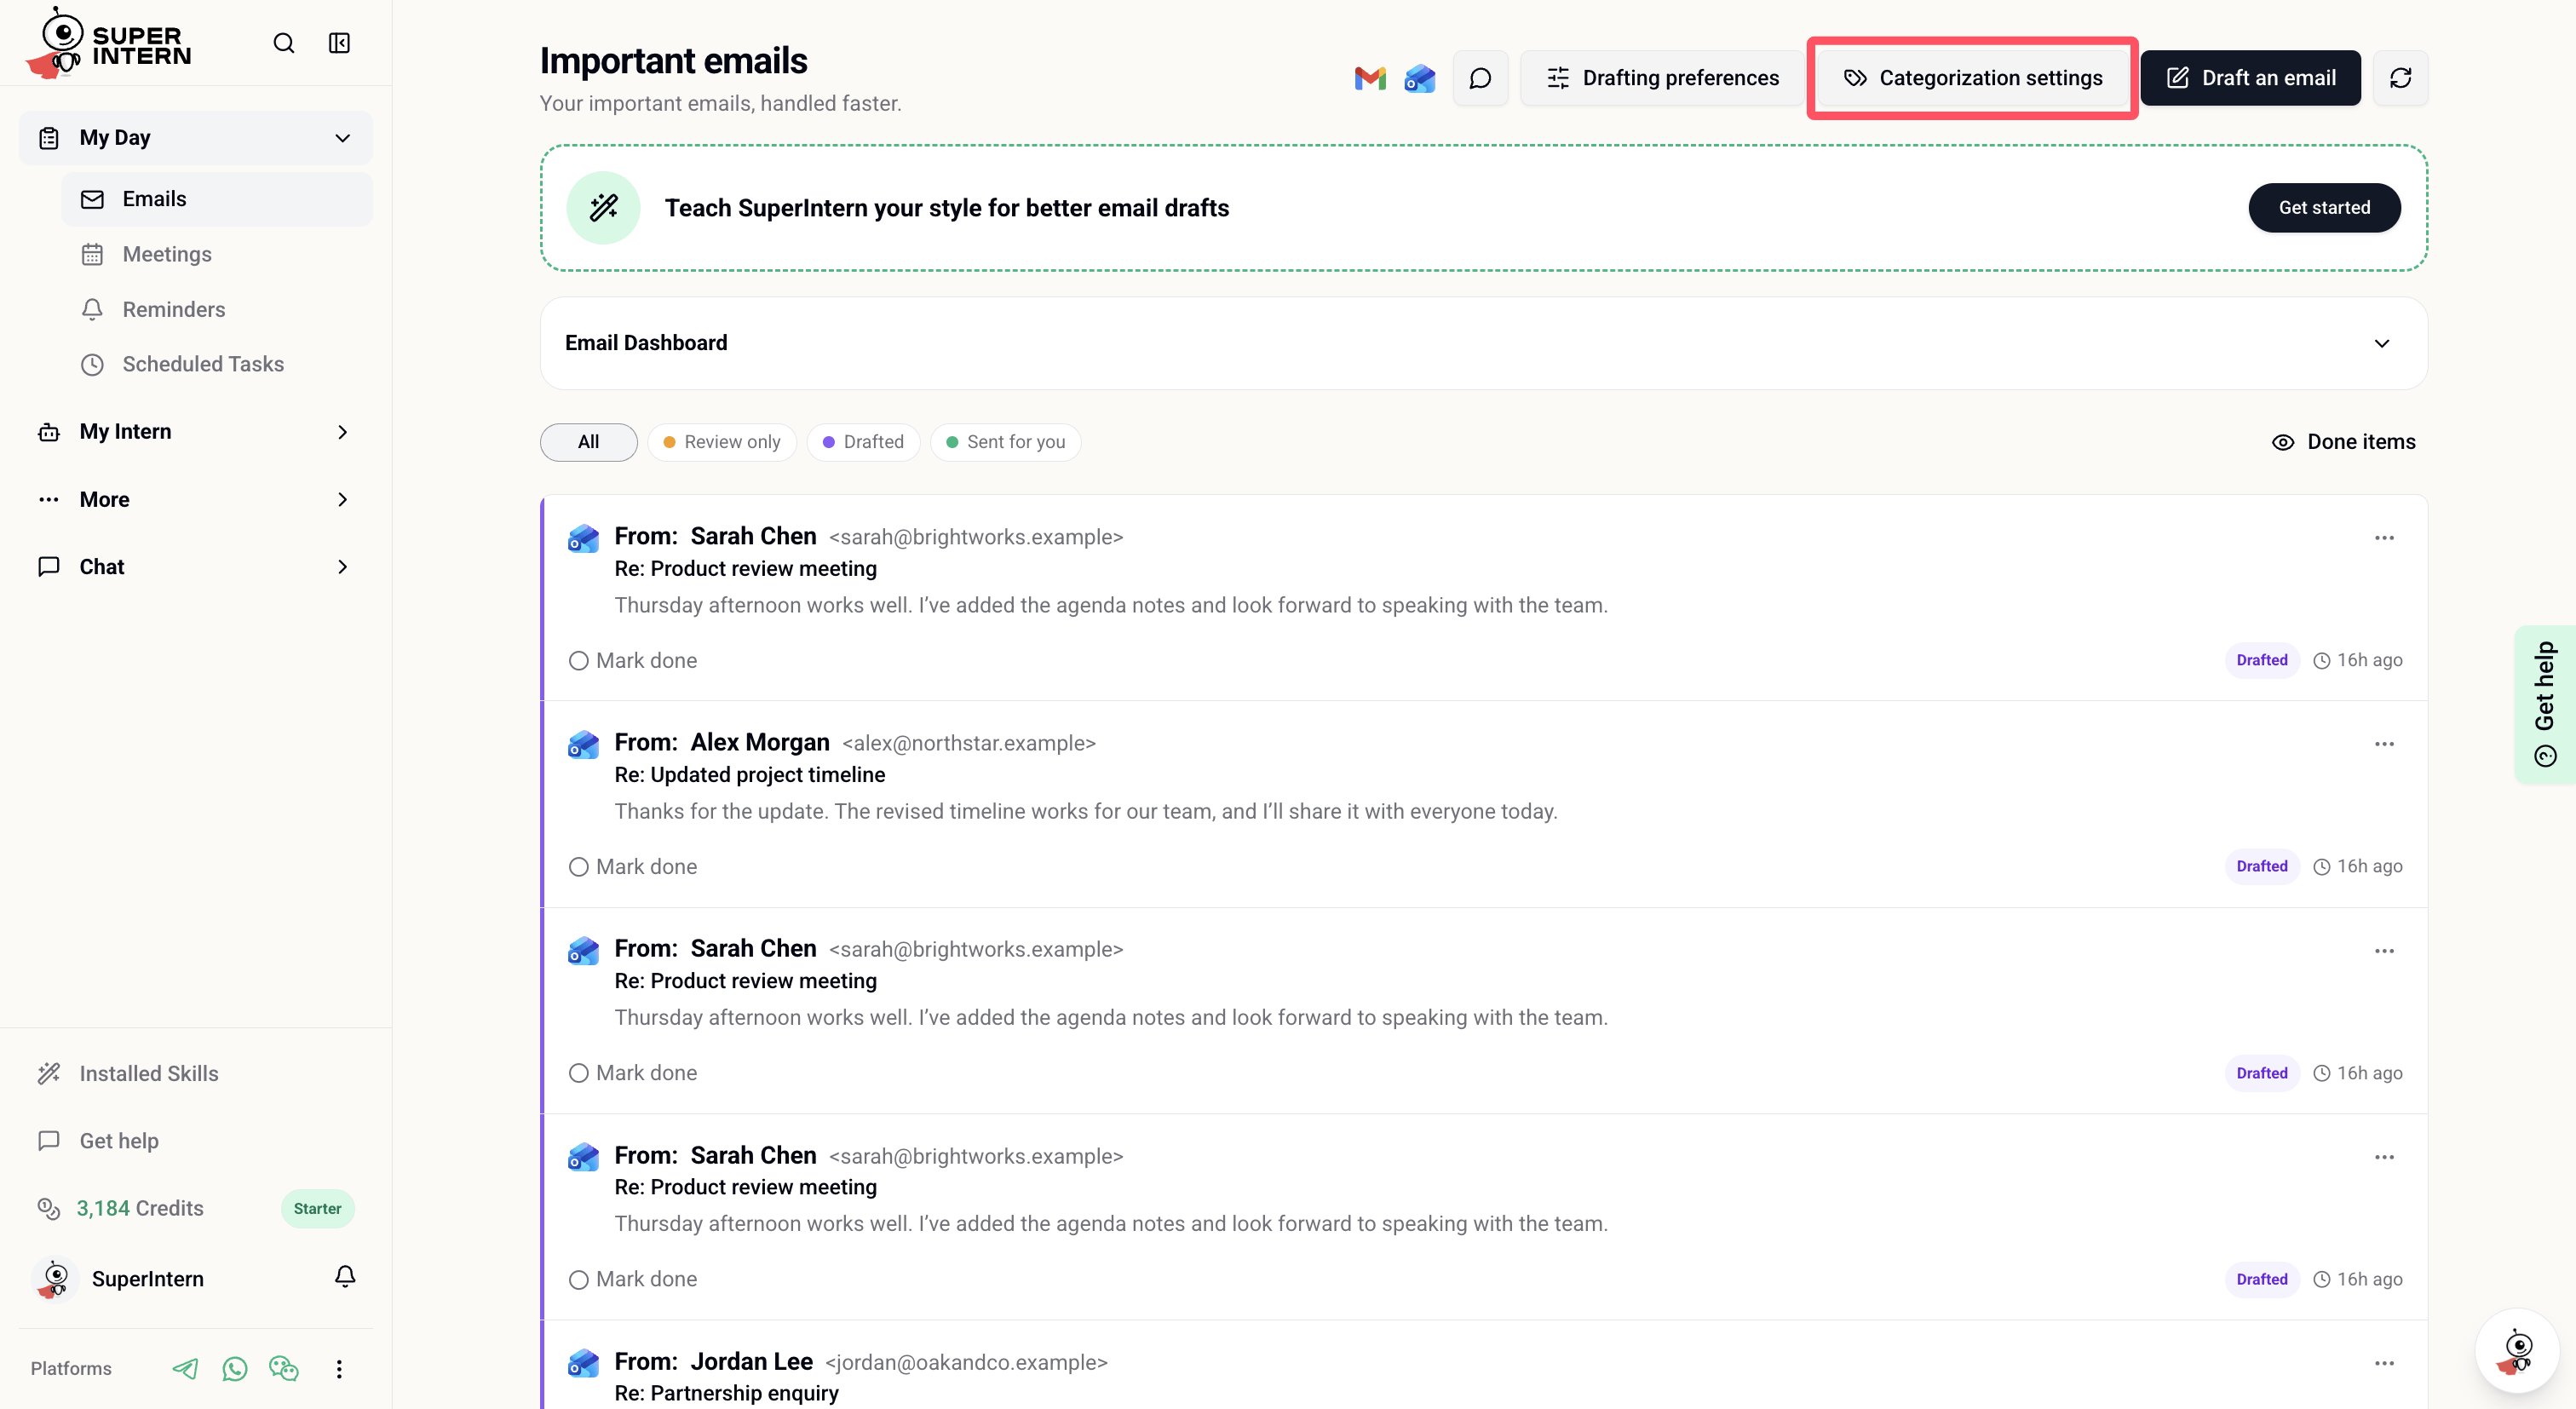
Choose your labels
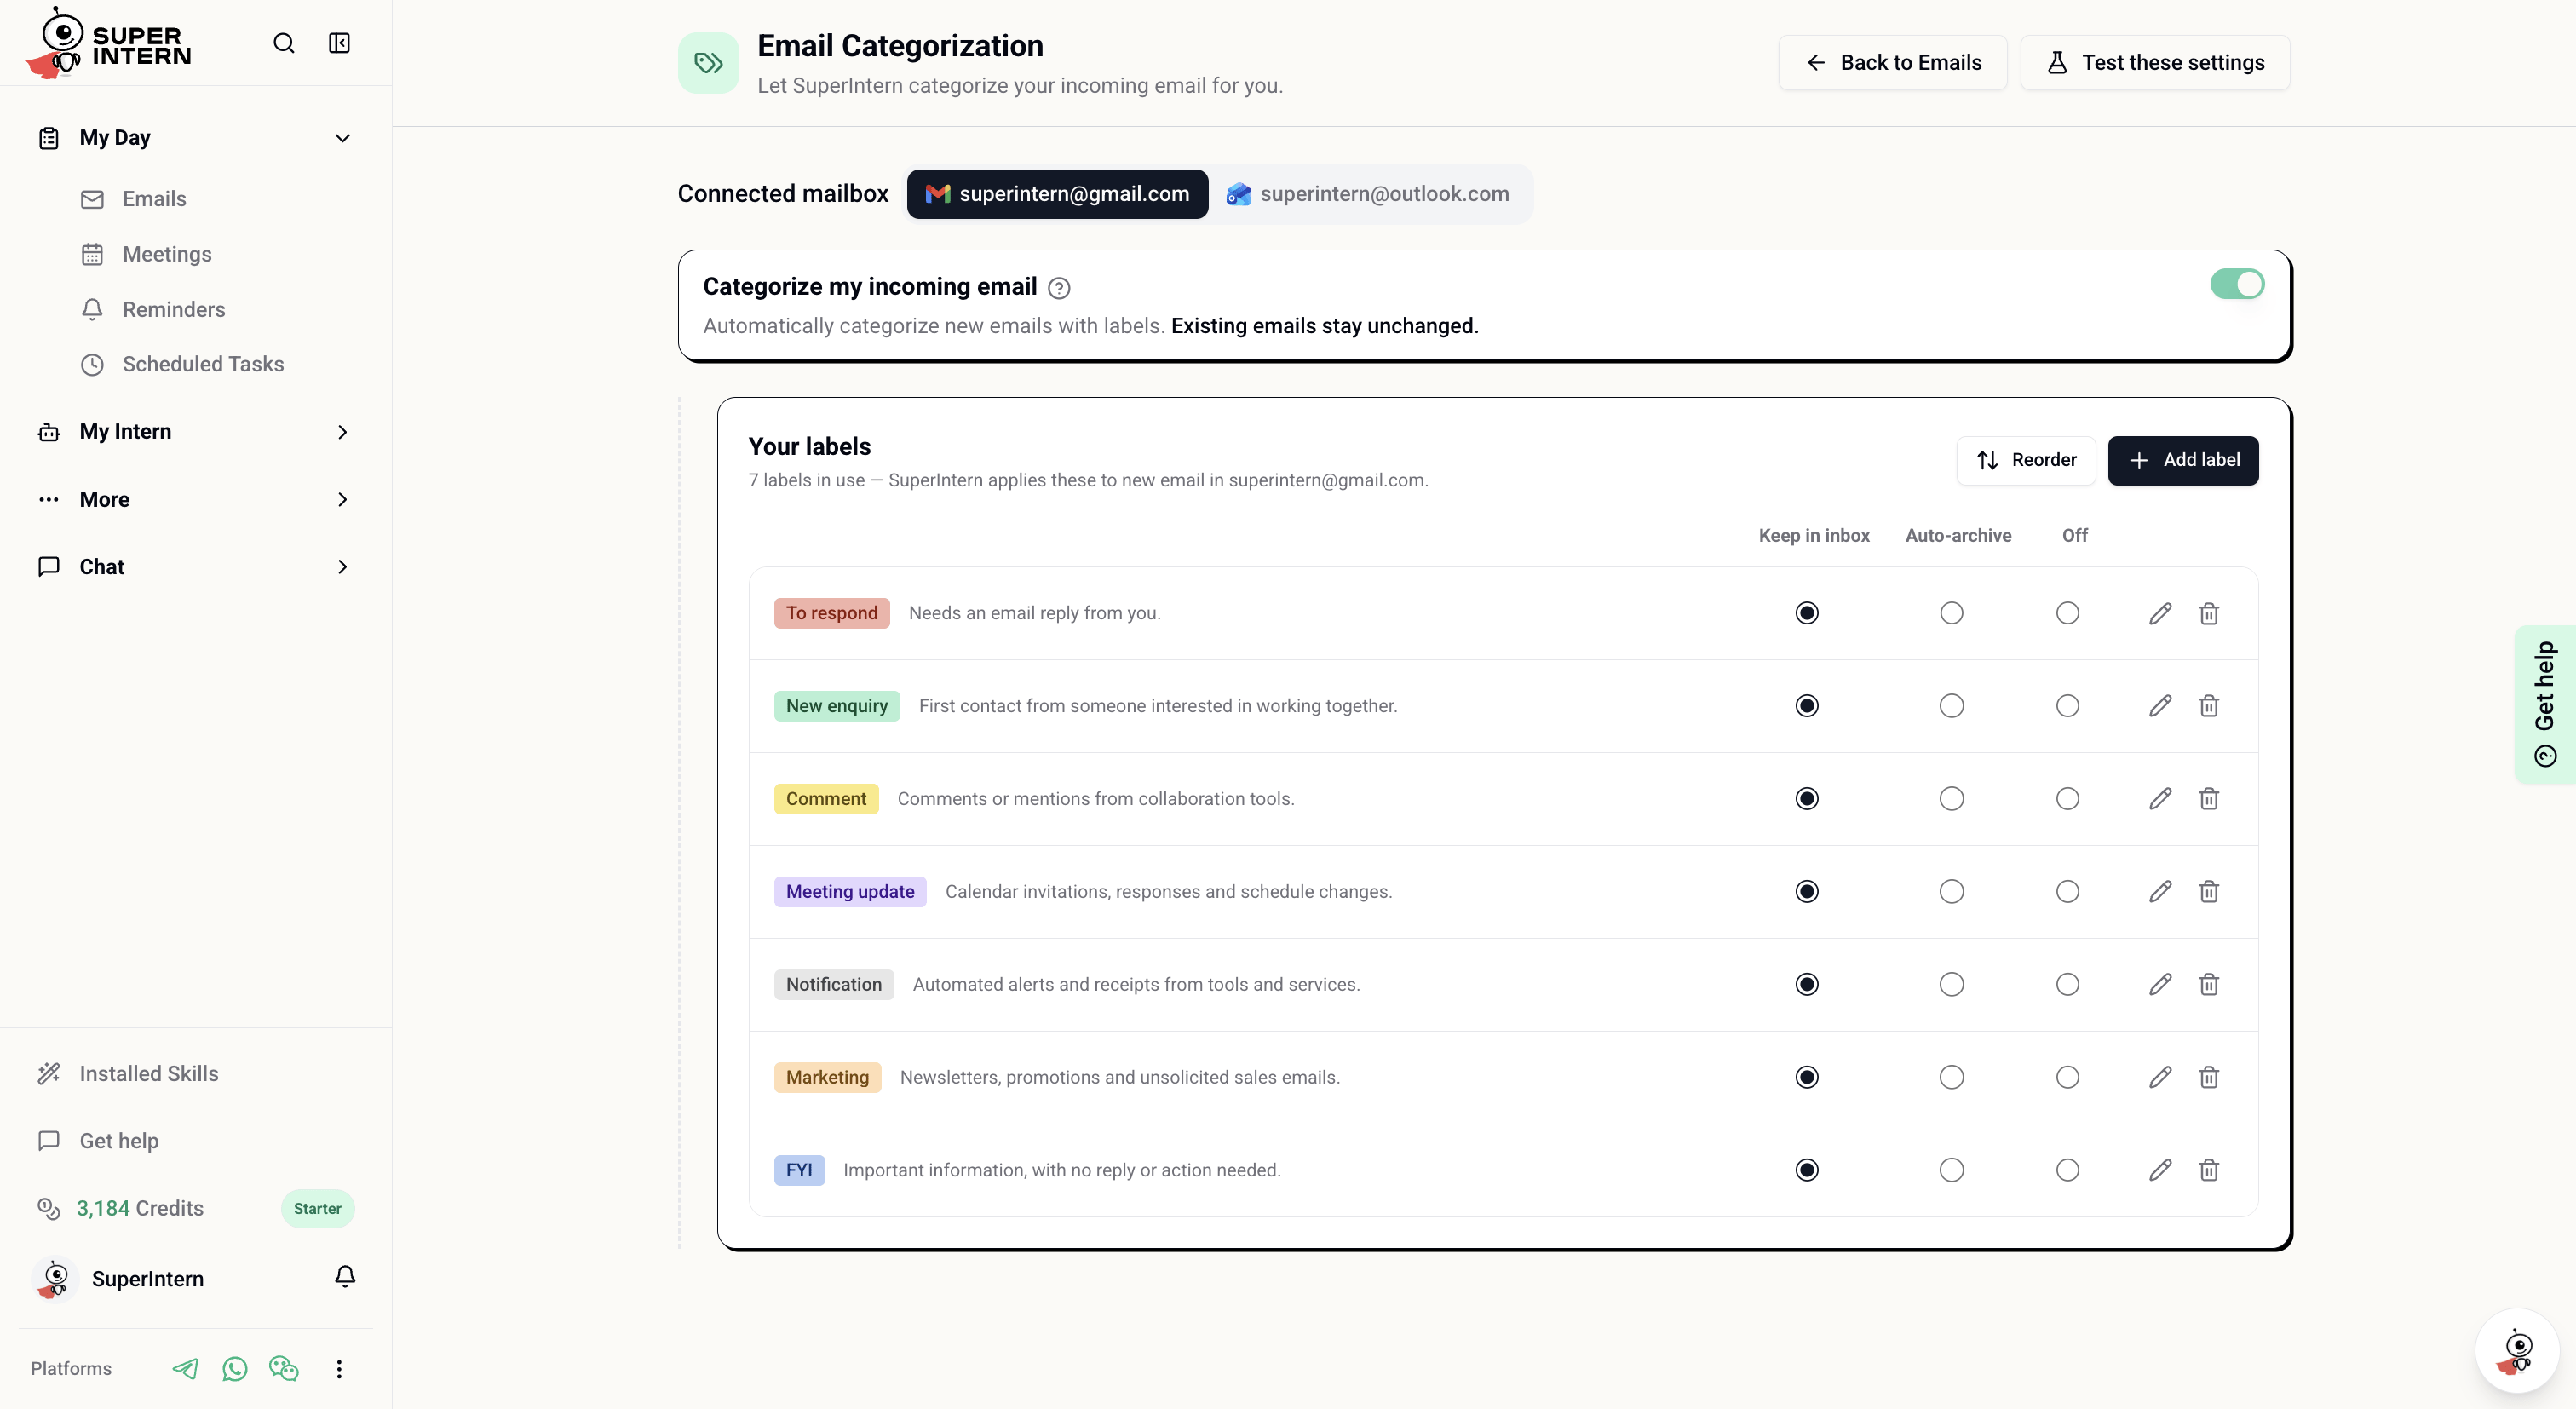
The first time you turn on categorization for a mailbox, select labels from General or Real estate. You can combine labels from both groups. The General set covers common inbox patterns such as messages that need a response, meeting updates, notifications, marketing email, and useful information that does not need action. The Real estate set covers sales, enquiries, referencing, payments, billing, and maintenance.1
Select the labels you want
Open each group and select the labels that match the way you work. You do not need to use every preset.
2
Review your selection
The Your labels area shows everything that will be added to this mailbox.
3
Save your labels
Save the selection. SuperIntern creates the labels in your connected mailbox immediately, even before any email matches them.
Decide where matching email goes
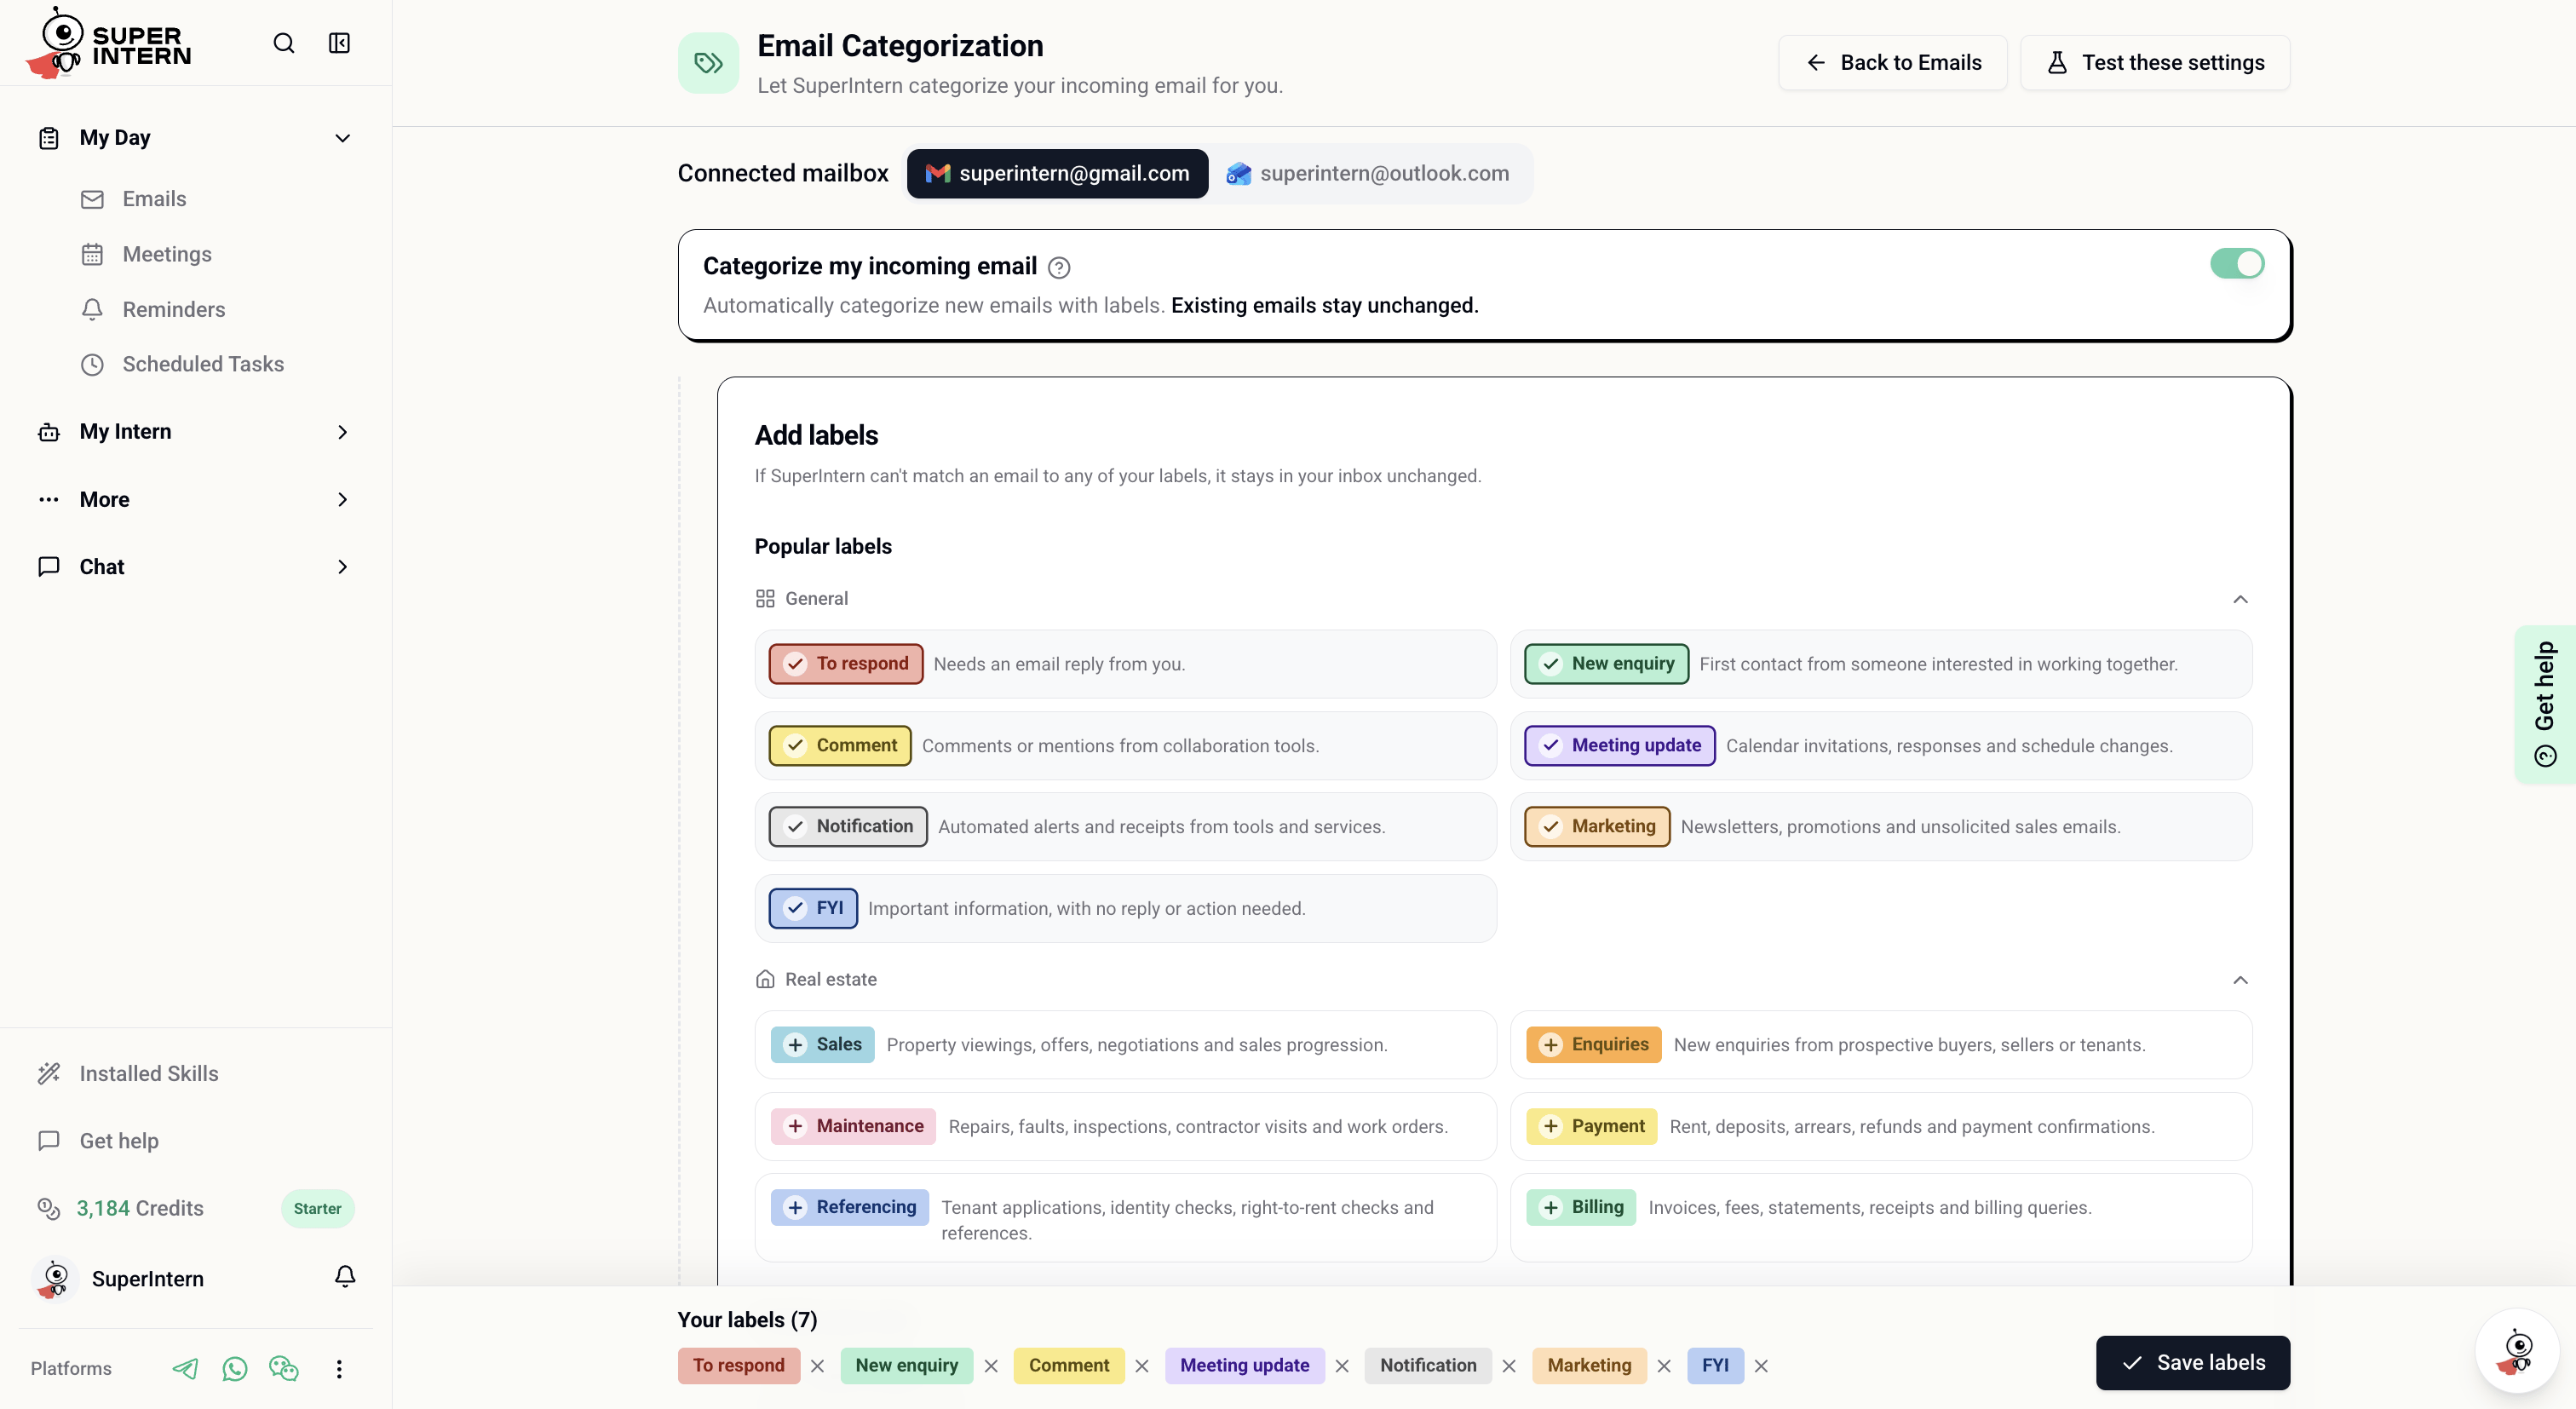
Each label has one of three actions:
You can change an action directly from the Your labels table. The new setting applies to email categorized afterward; it does not move older messages.
Set label priority
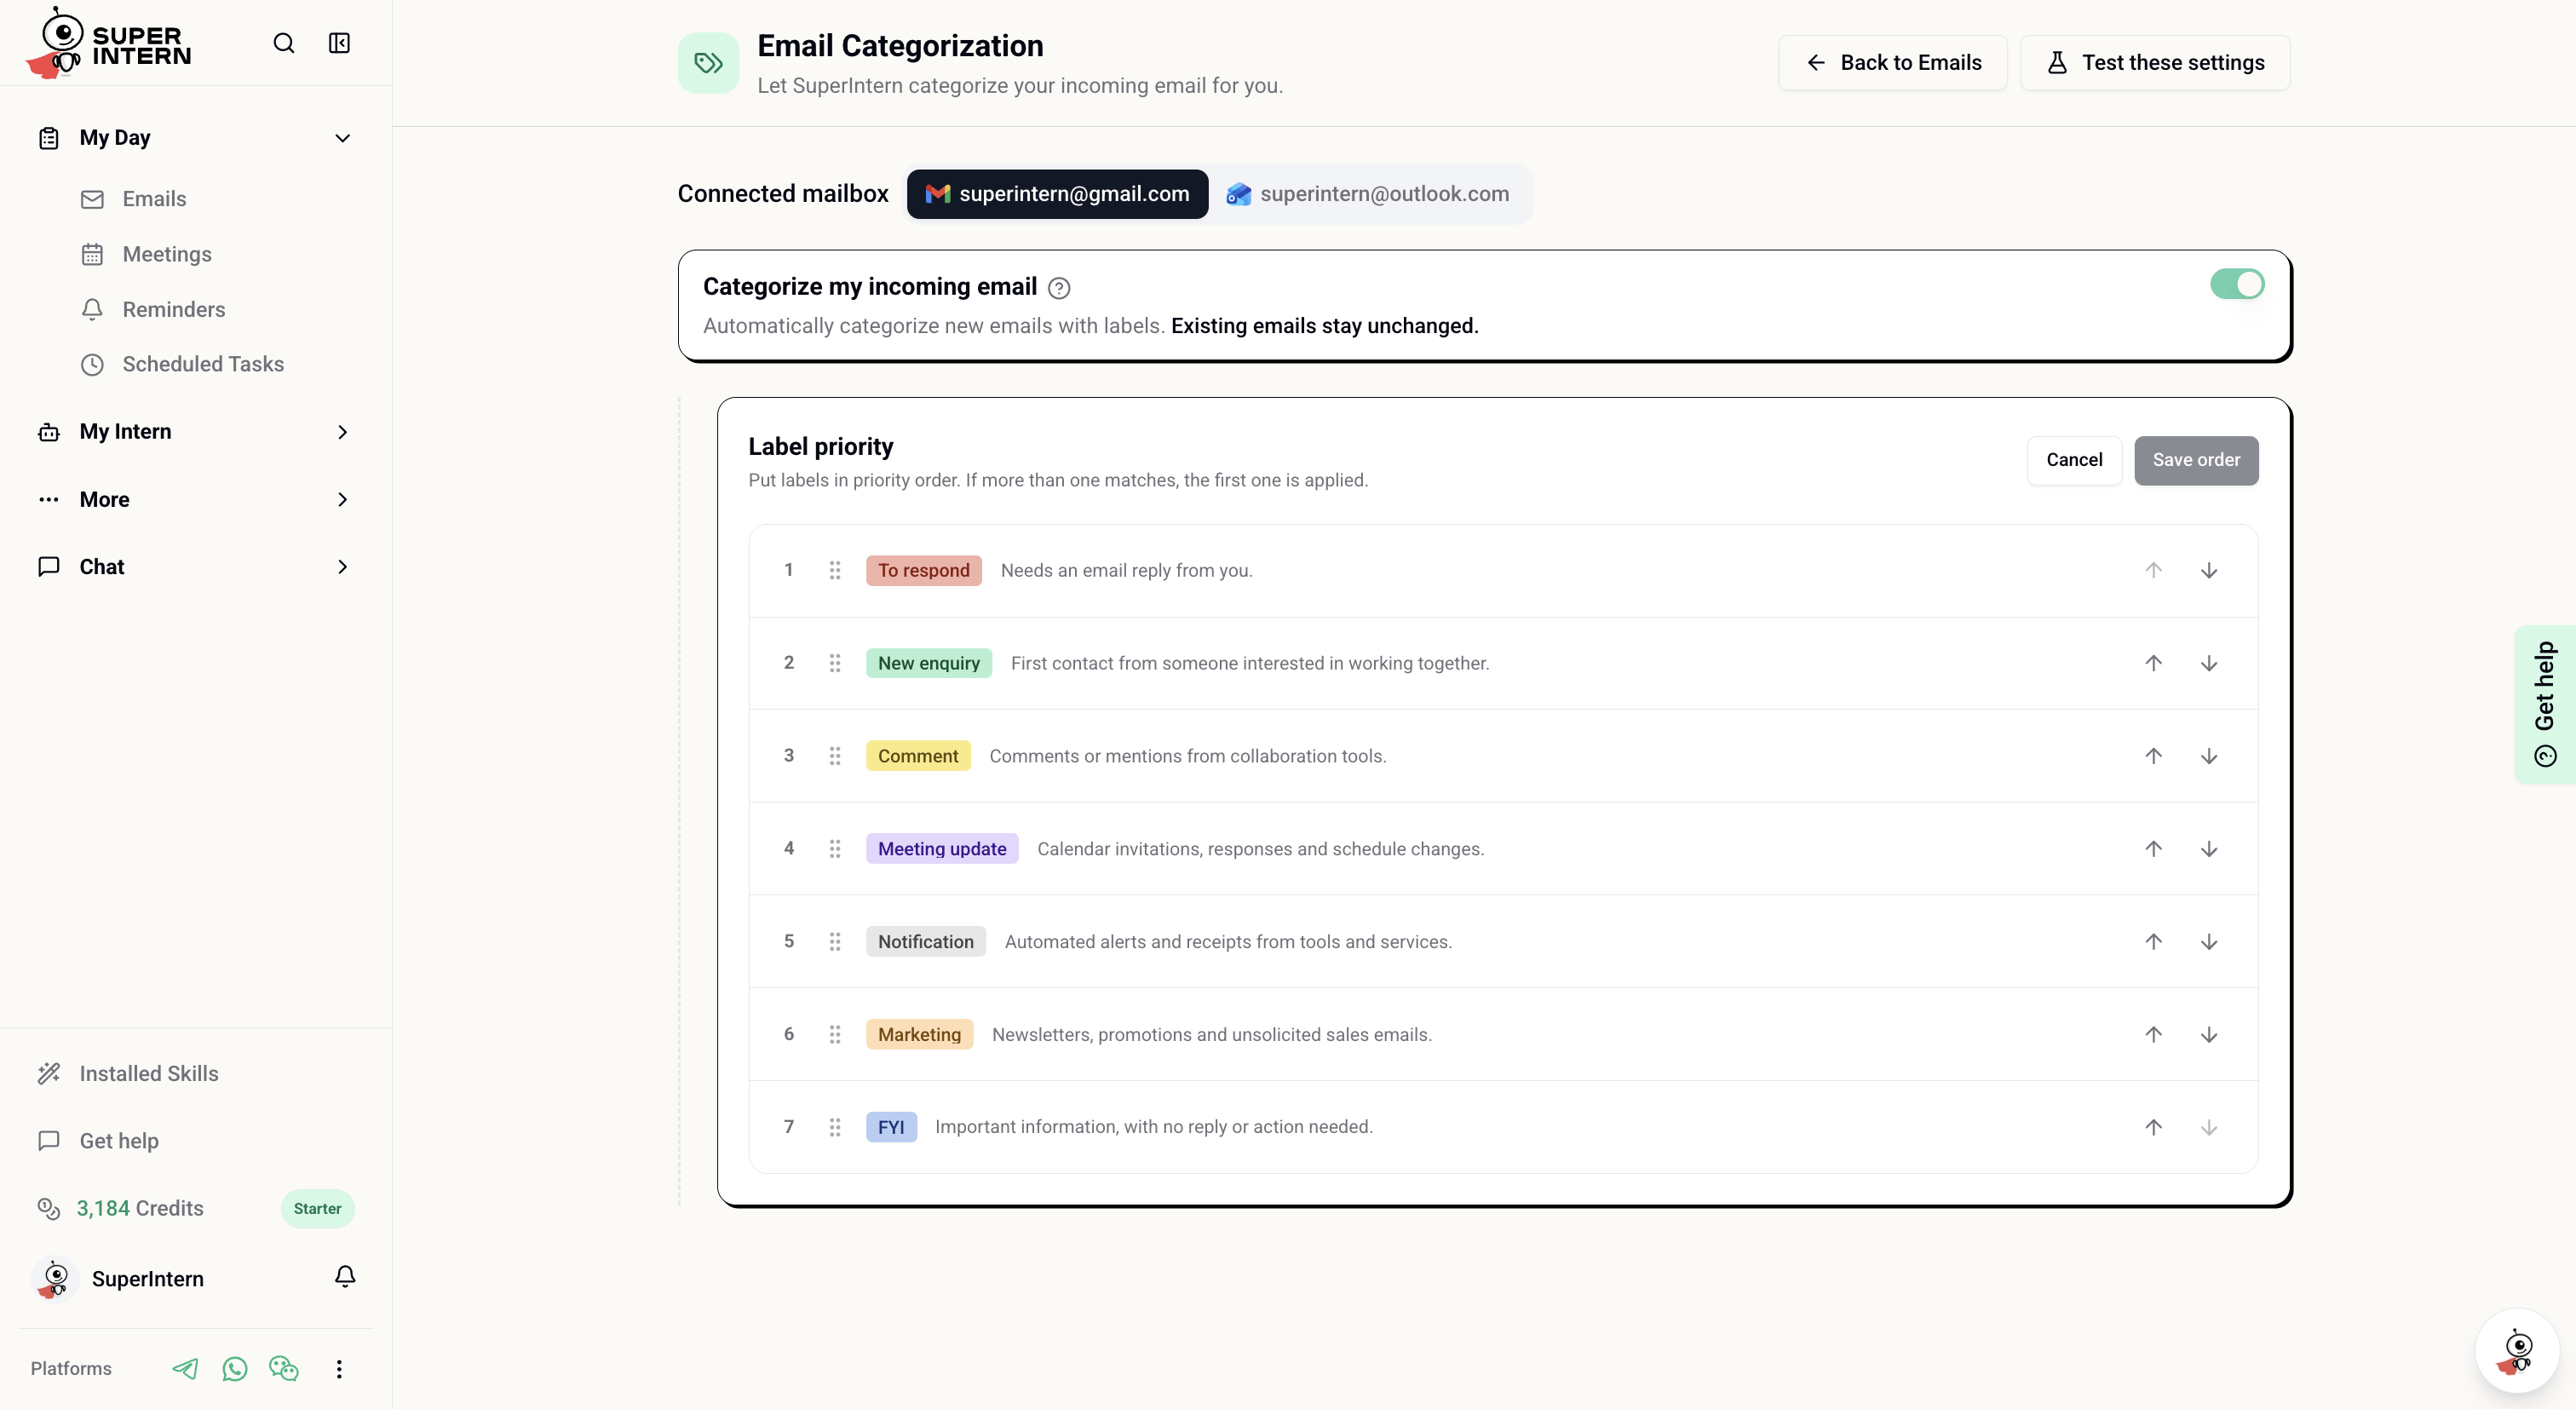
SuperIntern applies one label to each email. When a message could match more than one, the label higher in your priority list wins. To change the order:1
Open reorder mode
Select Reorder in the Your labels section.
2
Move labels into priority order
Drag a label or use its up and down controls. Put the most specific or important labels first.
3
Save the order
Select Save order. New email will use the updated priority.
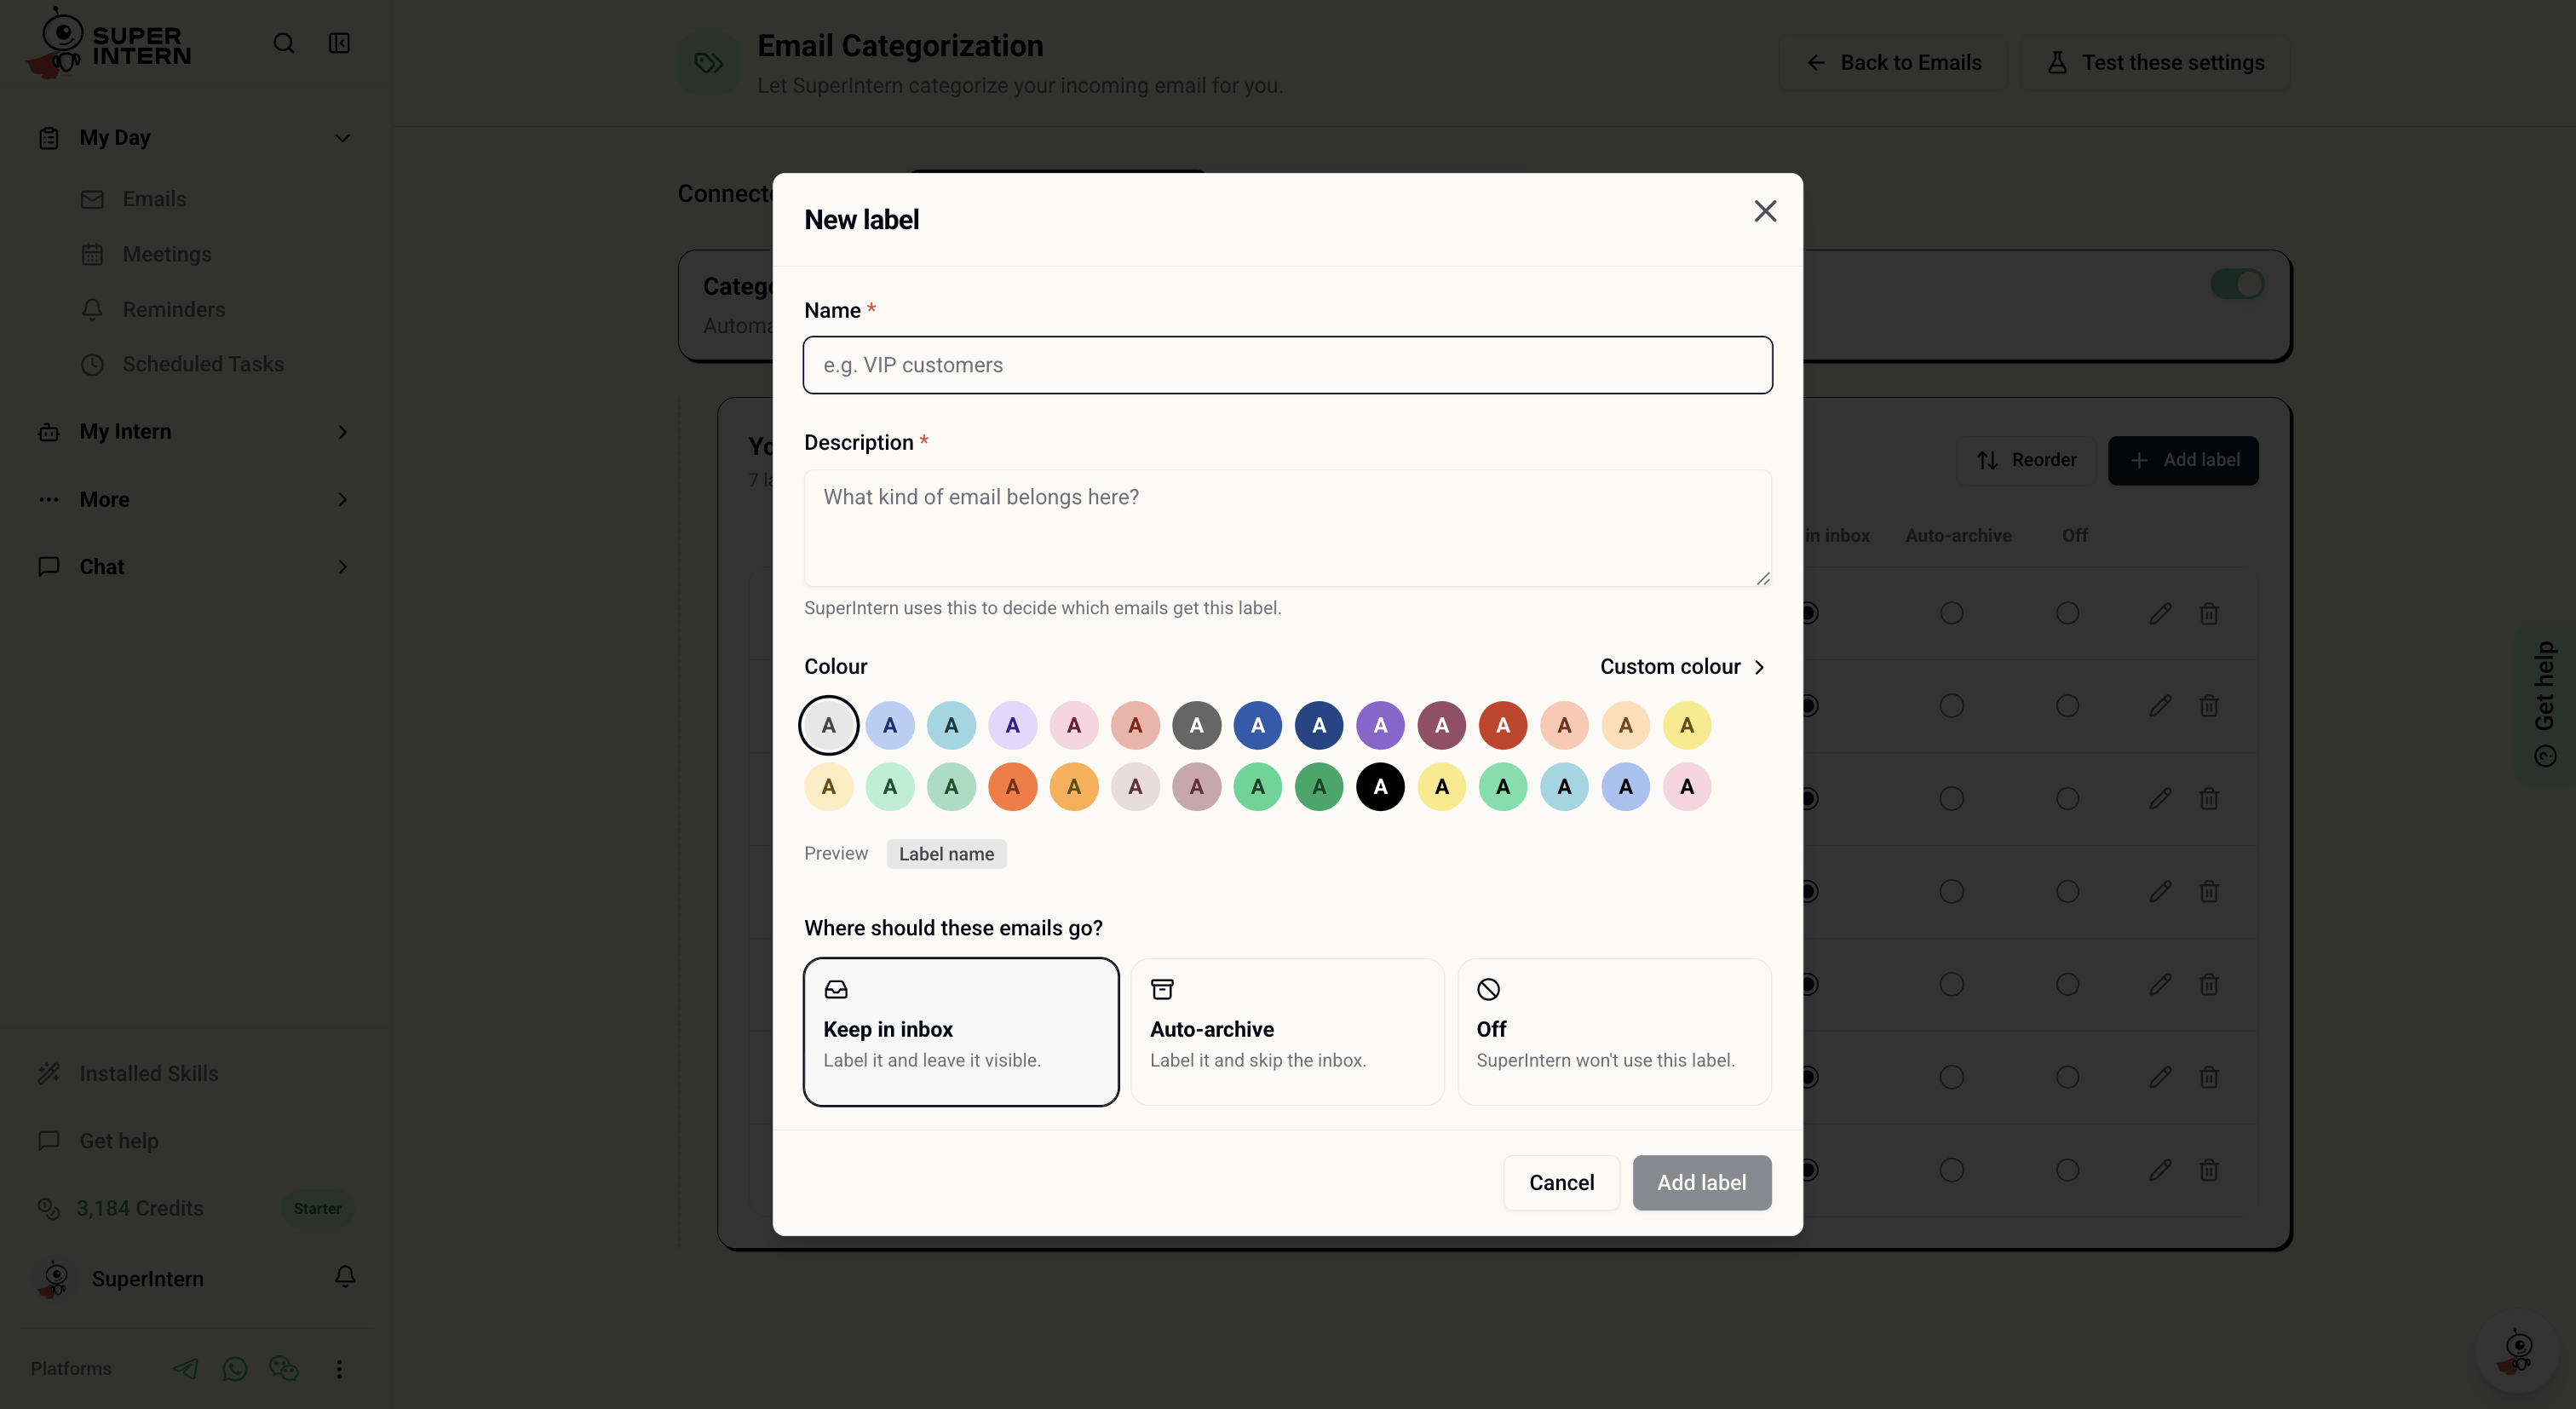
Add or edit a label
Select Add label to create your own. Every label needs:- A short, distinct name
- A description of the email that belongs there
- A colour
- An inbox action: Keep in inbox, Auto-archive, or Off
Questions from customers who need a reply from me. SuperIntern uses this description when deciding whether a new message matches.
Test your settings
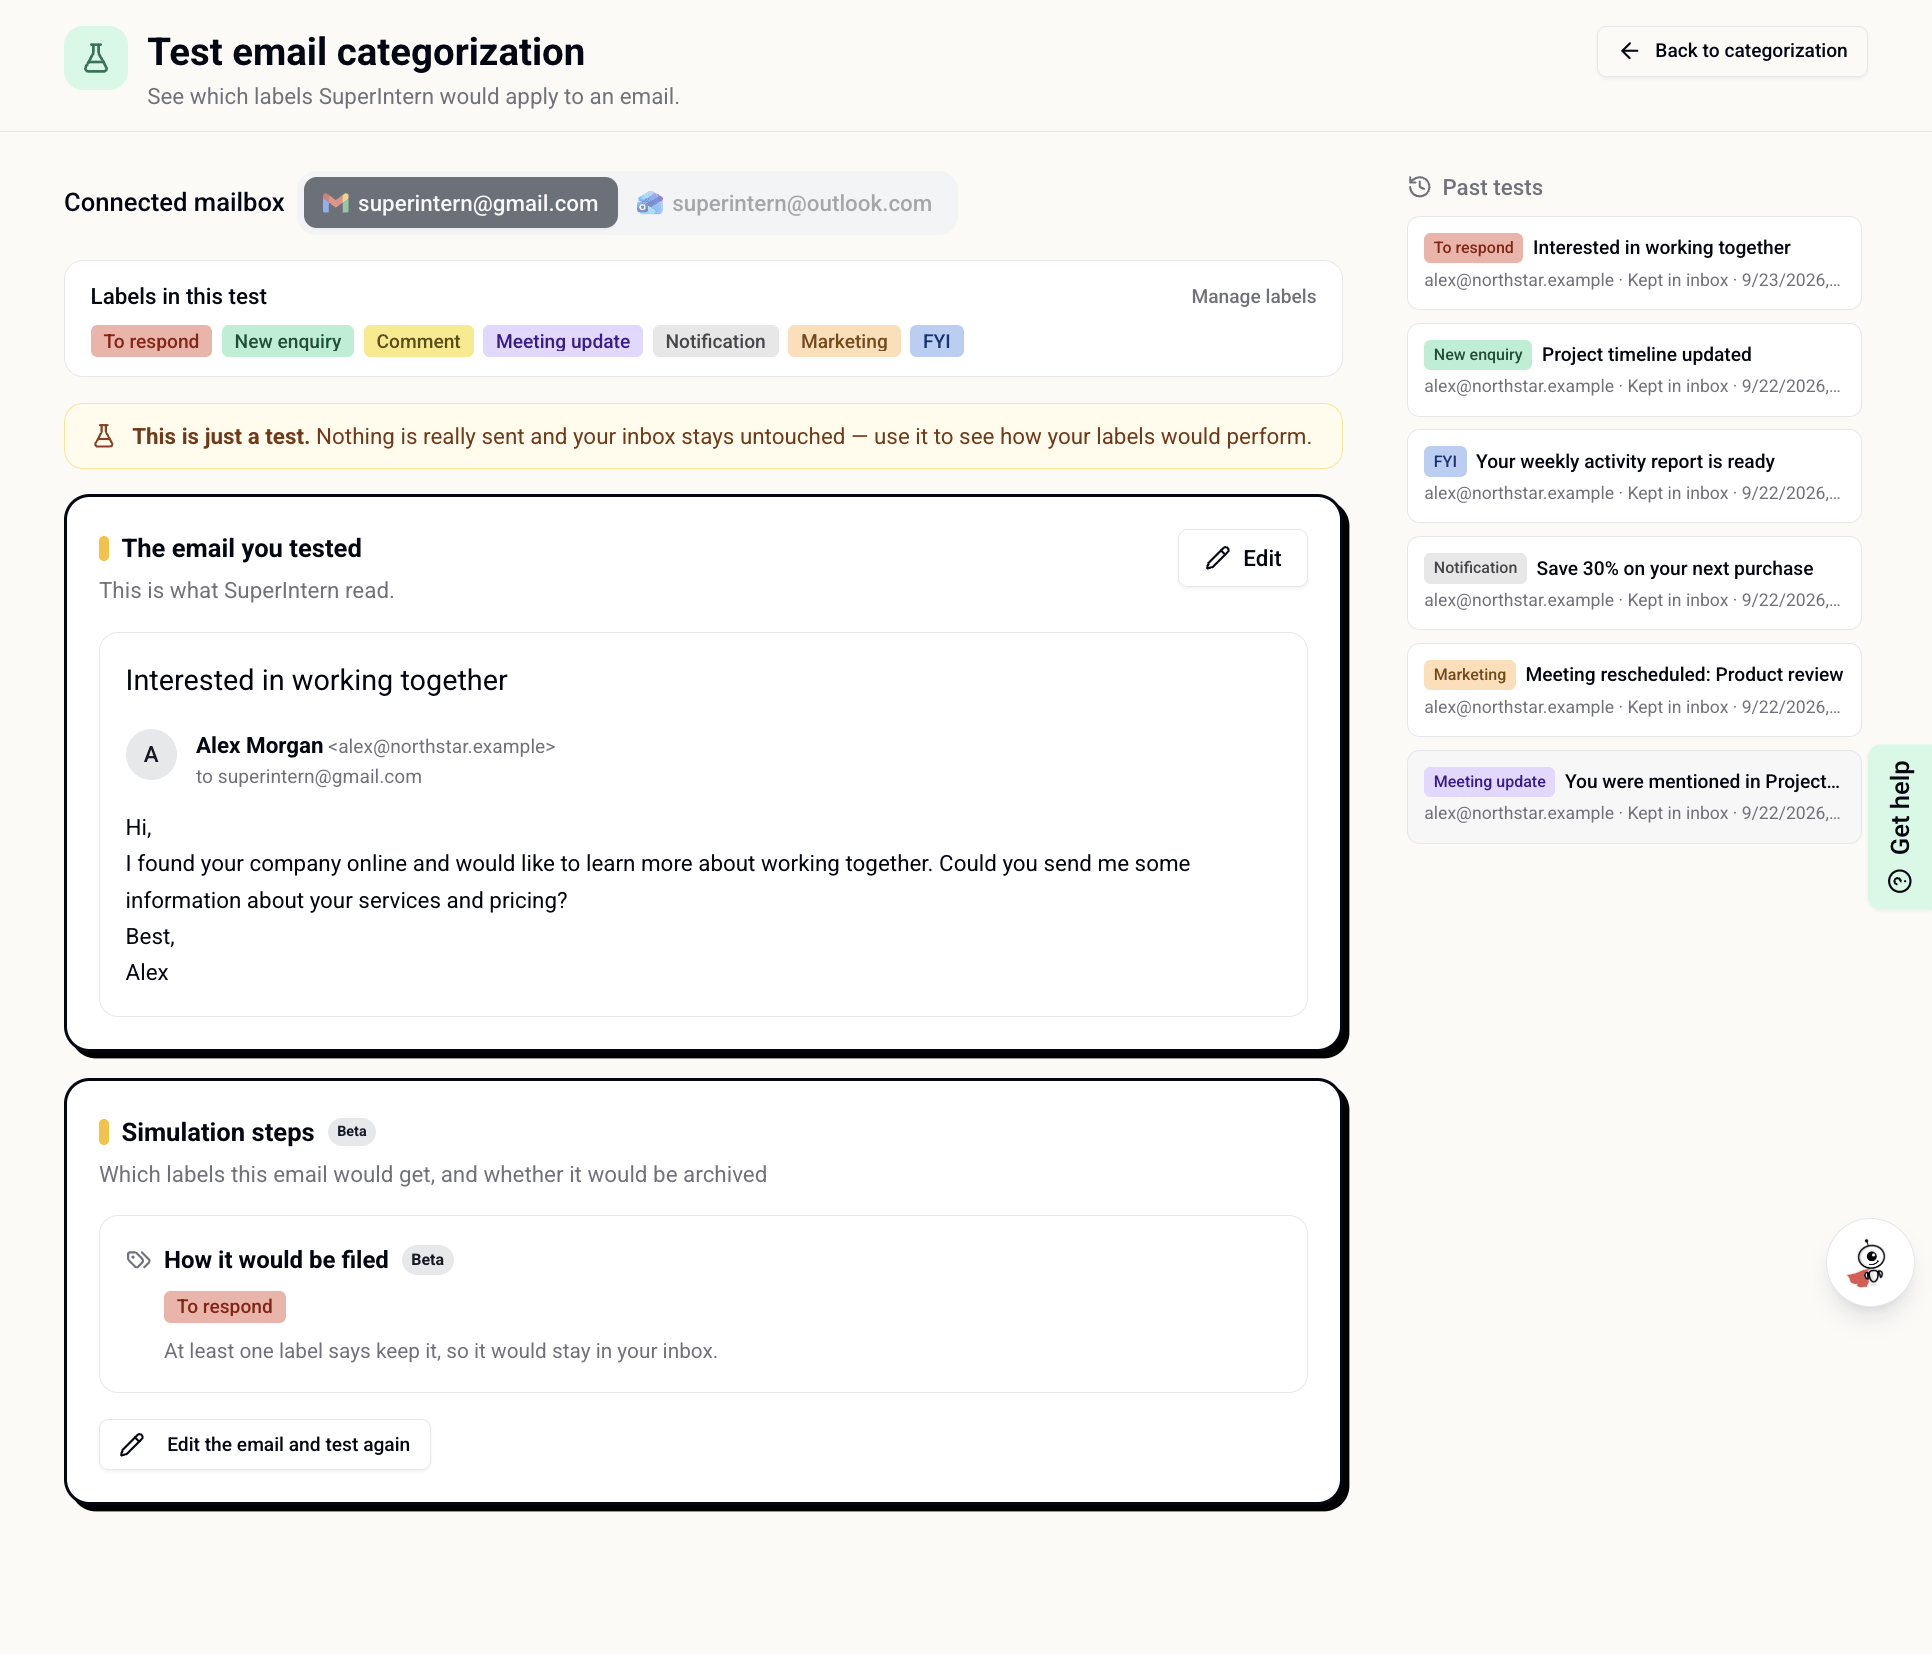
Select Test these settings in the top-right corner of the Email Categorization page. The test uses a sample incoming email and does not send anything or change your inbox.1
Choose a mailbox
If both Gmail and Outlook are connected, select the mailbox whose labels you want to test. The labels included in the test appear above the email form.
2
Write a sample incoming email
Enter the sender, subject, and message body. Make it similar to a real email you expect to receive.
3
Run the test
Select Run test. The result shows the single label SuperIntern would apply and whether the email would stay in your inbox or be archived.
4
Refine and try again
Select Edit the email and test again, or update your label descriptions and priority. Previous categorization tests remain available under Past tests.
A categorization test evaluates labels only. It does not test whether SuperIntern would draft or send a reply.