

Before You Start
1
Connect your email
In the web app, connect Gmail or Outlook from More → Integrations. This is what lets SuperIntern watch for important messages and draft replies.
2
Connect WhatsApp
Click the WhatsApp icon in the Platforms row at the bottom of the sidebar and follow the prompts, or connect it during onboarding. See Chat on WhatsApp for details.
1. Set Reminders
Tell SuperIntern what to remind you about and when. It confirms the schedule, then messages you on WhatsApp at the right time: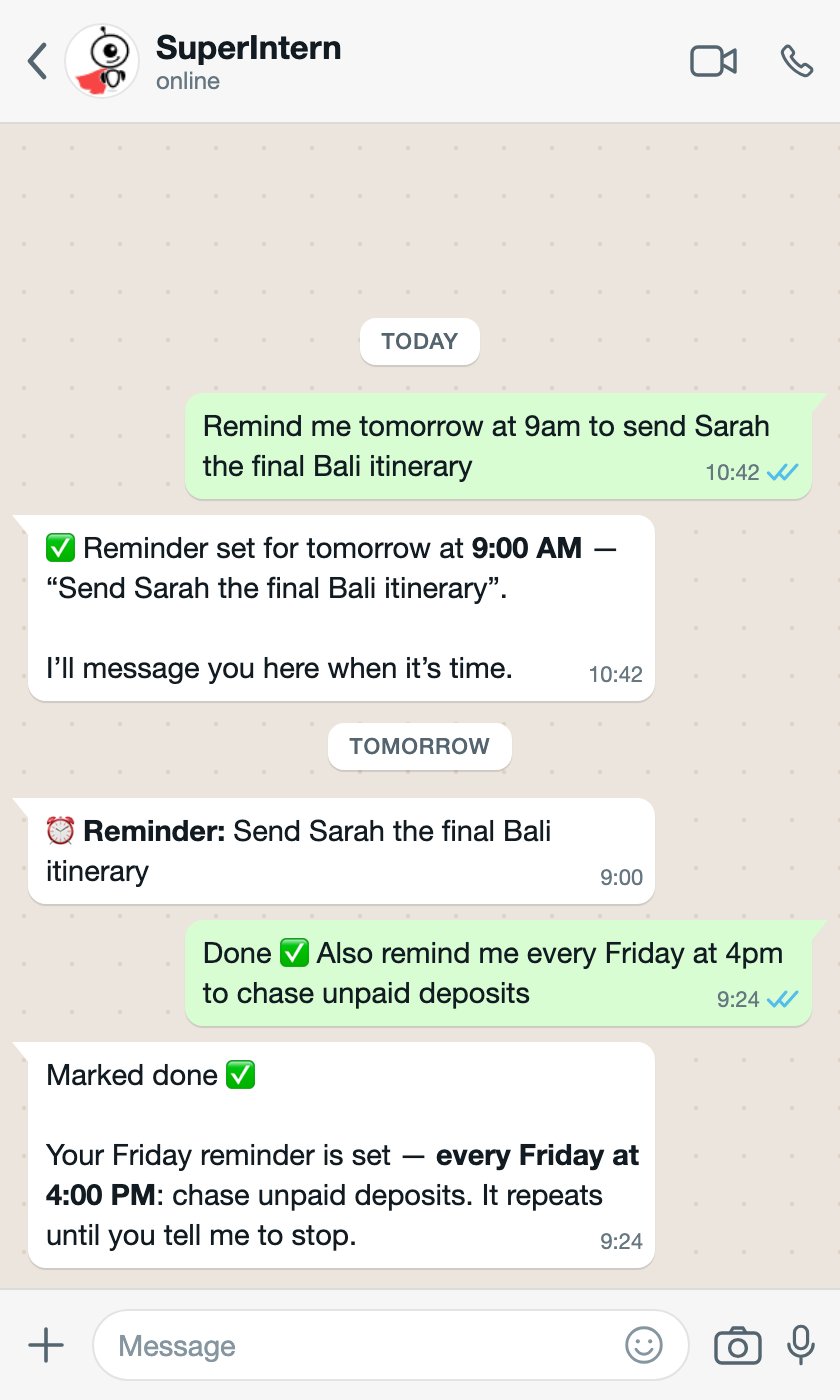
Reminders come back to you as WhatsApp messages at the scheduled time.
What reminders do I have coming up? or say Move it to Monday. They also appear in My Day → Reminders in the web app. See Reminders.
2. Hear About Important Email — Without Checking Your Inbox
SuperIntern monitors your connected mailbox in the background. When something important arrives — a client confirming a booking, a payment question, a deadline — it messages you on WhatsApp with a short summary and offers to draft the reply.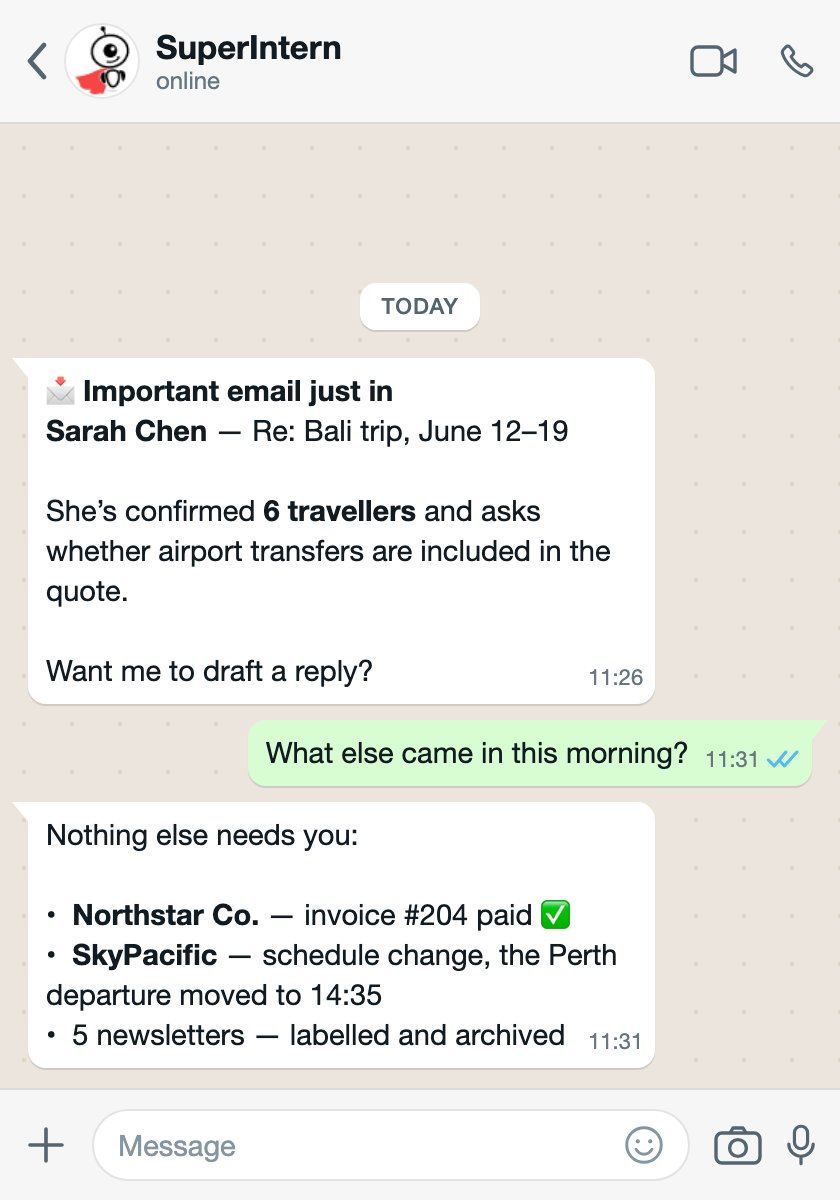
Important email finds you on WhatsApp; everything else is summarized on request.
Only ping me about client emails, not newsletters or Don't message me after 7pm. See Heartbeats for how proactive check-ins work.
3. Reply and Send Email From Chat
Tell SuperIntern what you want to say, and it writes the full email and shows it to you in WhatsApp first. Nothing is sent until you approve it: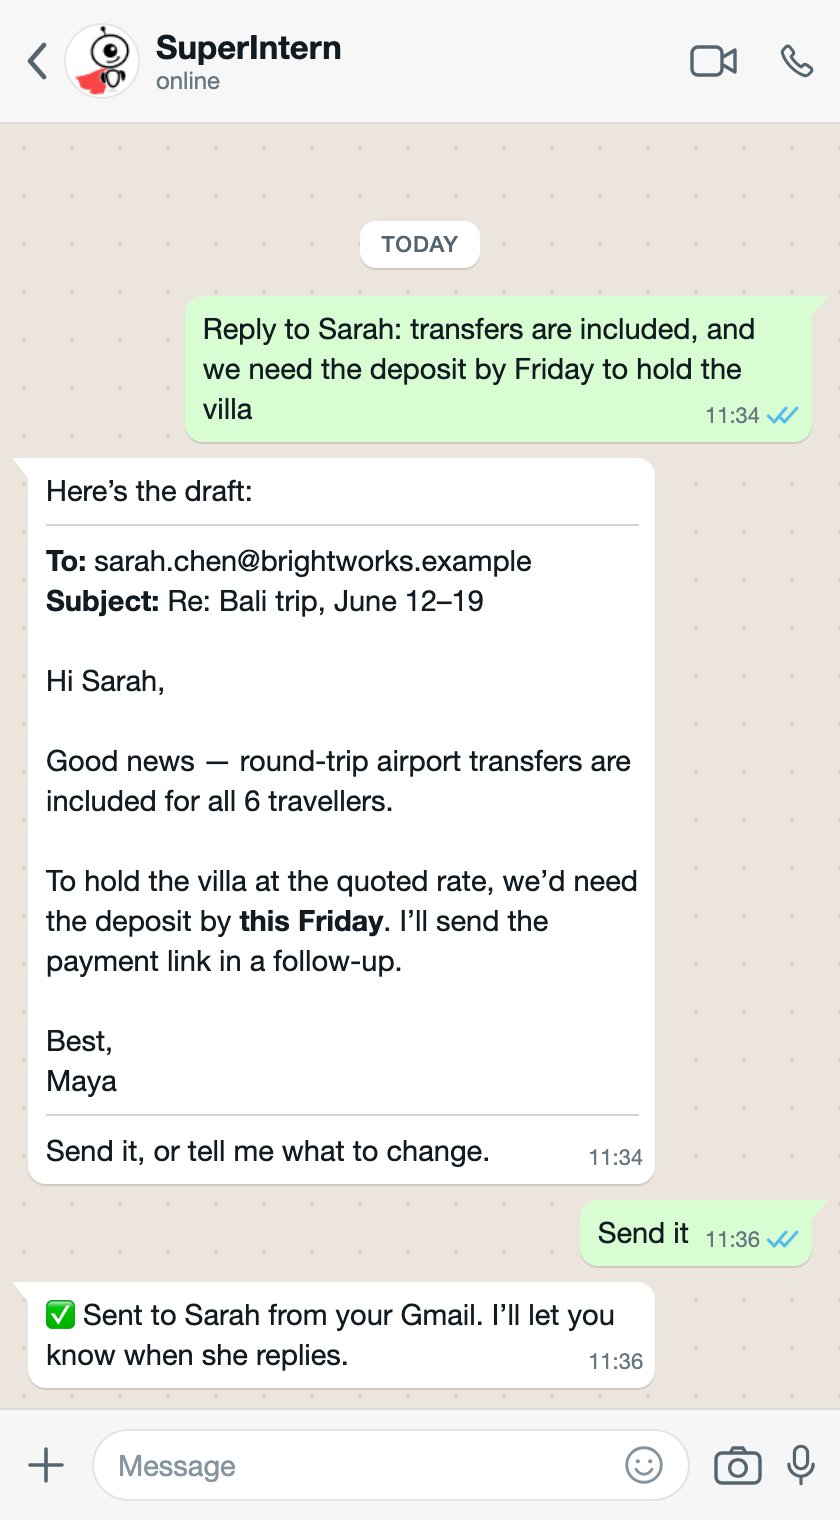
The full draft appears in chat — approve it with one message, or ask for changes.
Send it to send from your connected Gmail or Outlook account, or ask for changes first — Make it shorter, Mention the payment link, Sounds too formal. New emails work the same way:
4. Teach SuperIntern How to Handle Your Email
This is where SuperIntern stops being a tool and starts being an assistant. Describe how you want your email handled — in plain language, right in WhatsApp — and it turns your instructions into standing rules it follows from then on: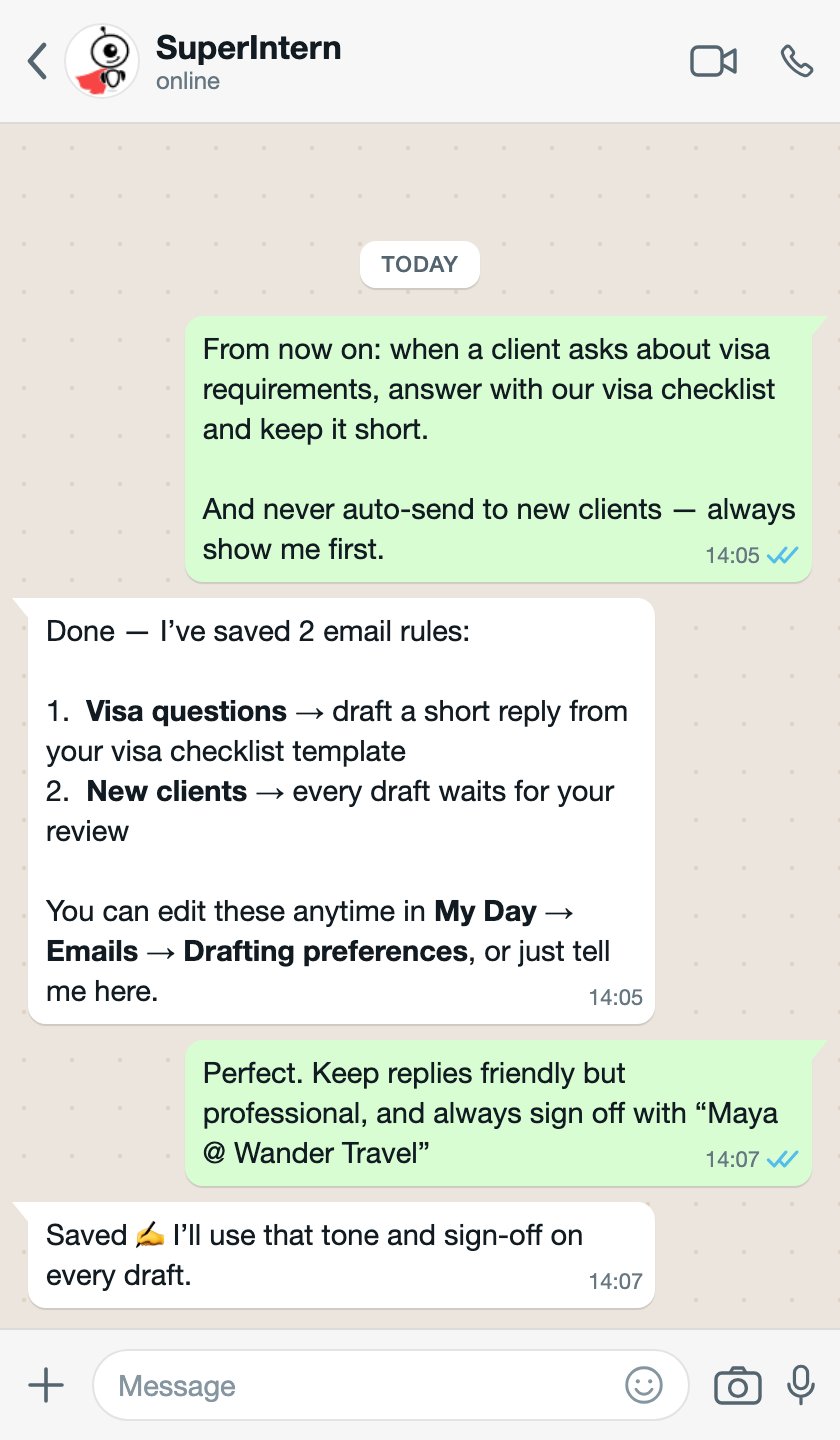
Plain-language instructions become standing email rules.
Going Further: Organize Your Inbox With Labels
Ready for more? Email Categorization sorts every new email as it arrives — labelling client enquiries, payments, and marketing separately, and archiving the noise before you ever see it. Set it up in the web app:1
Open Categorization settings
Go to My Day → Emails and select Categorization settings.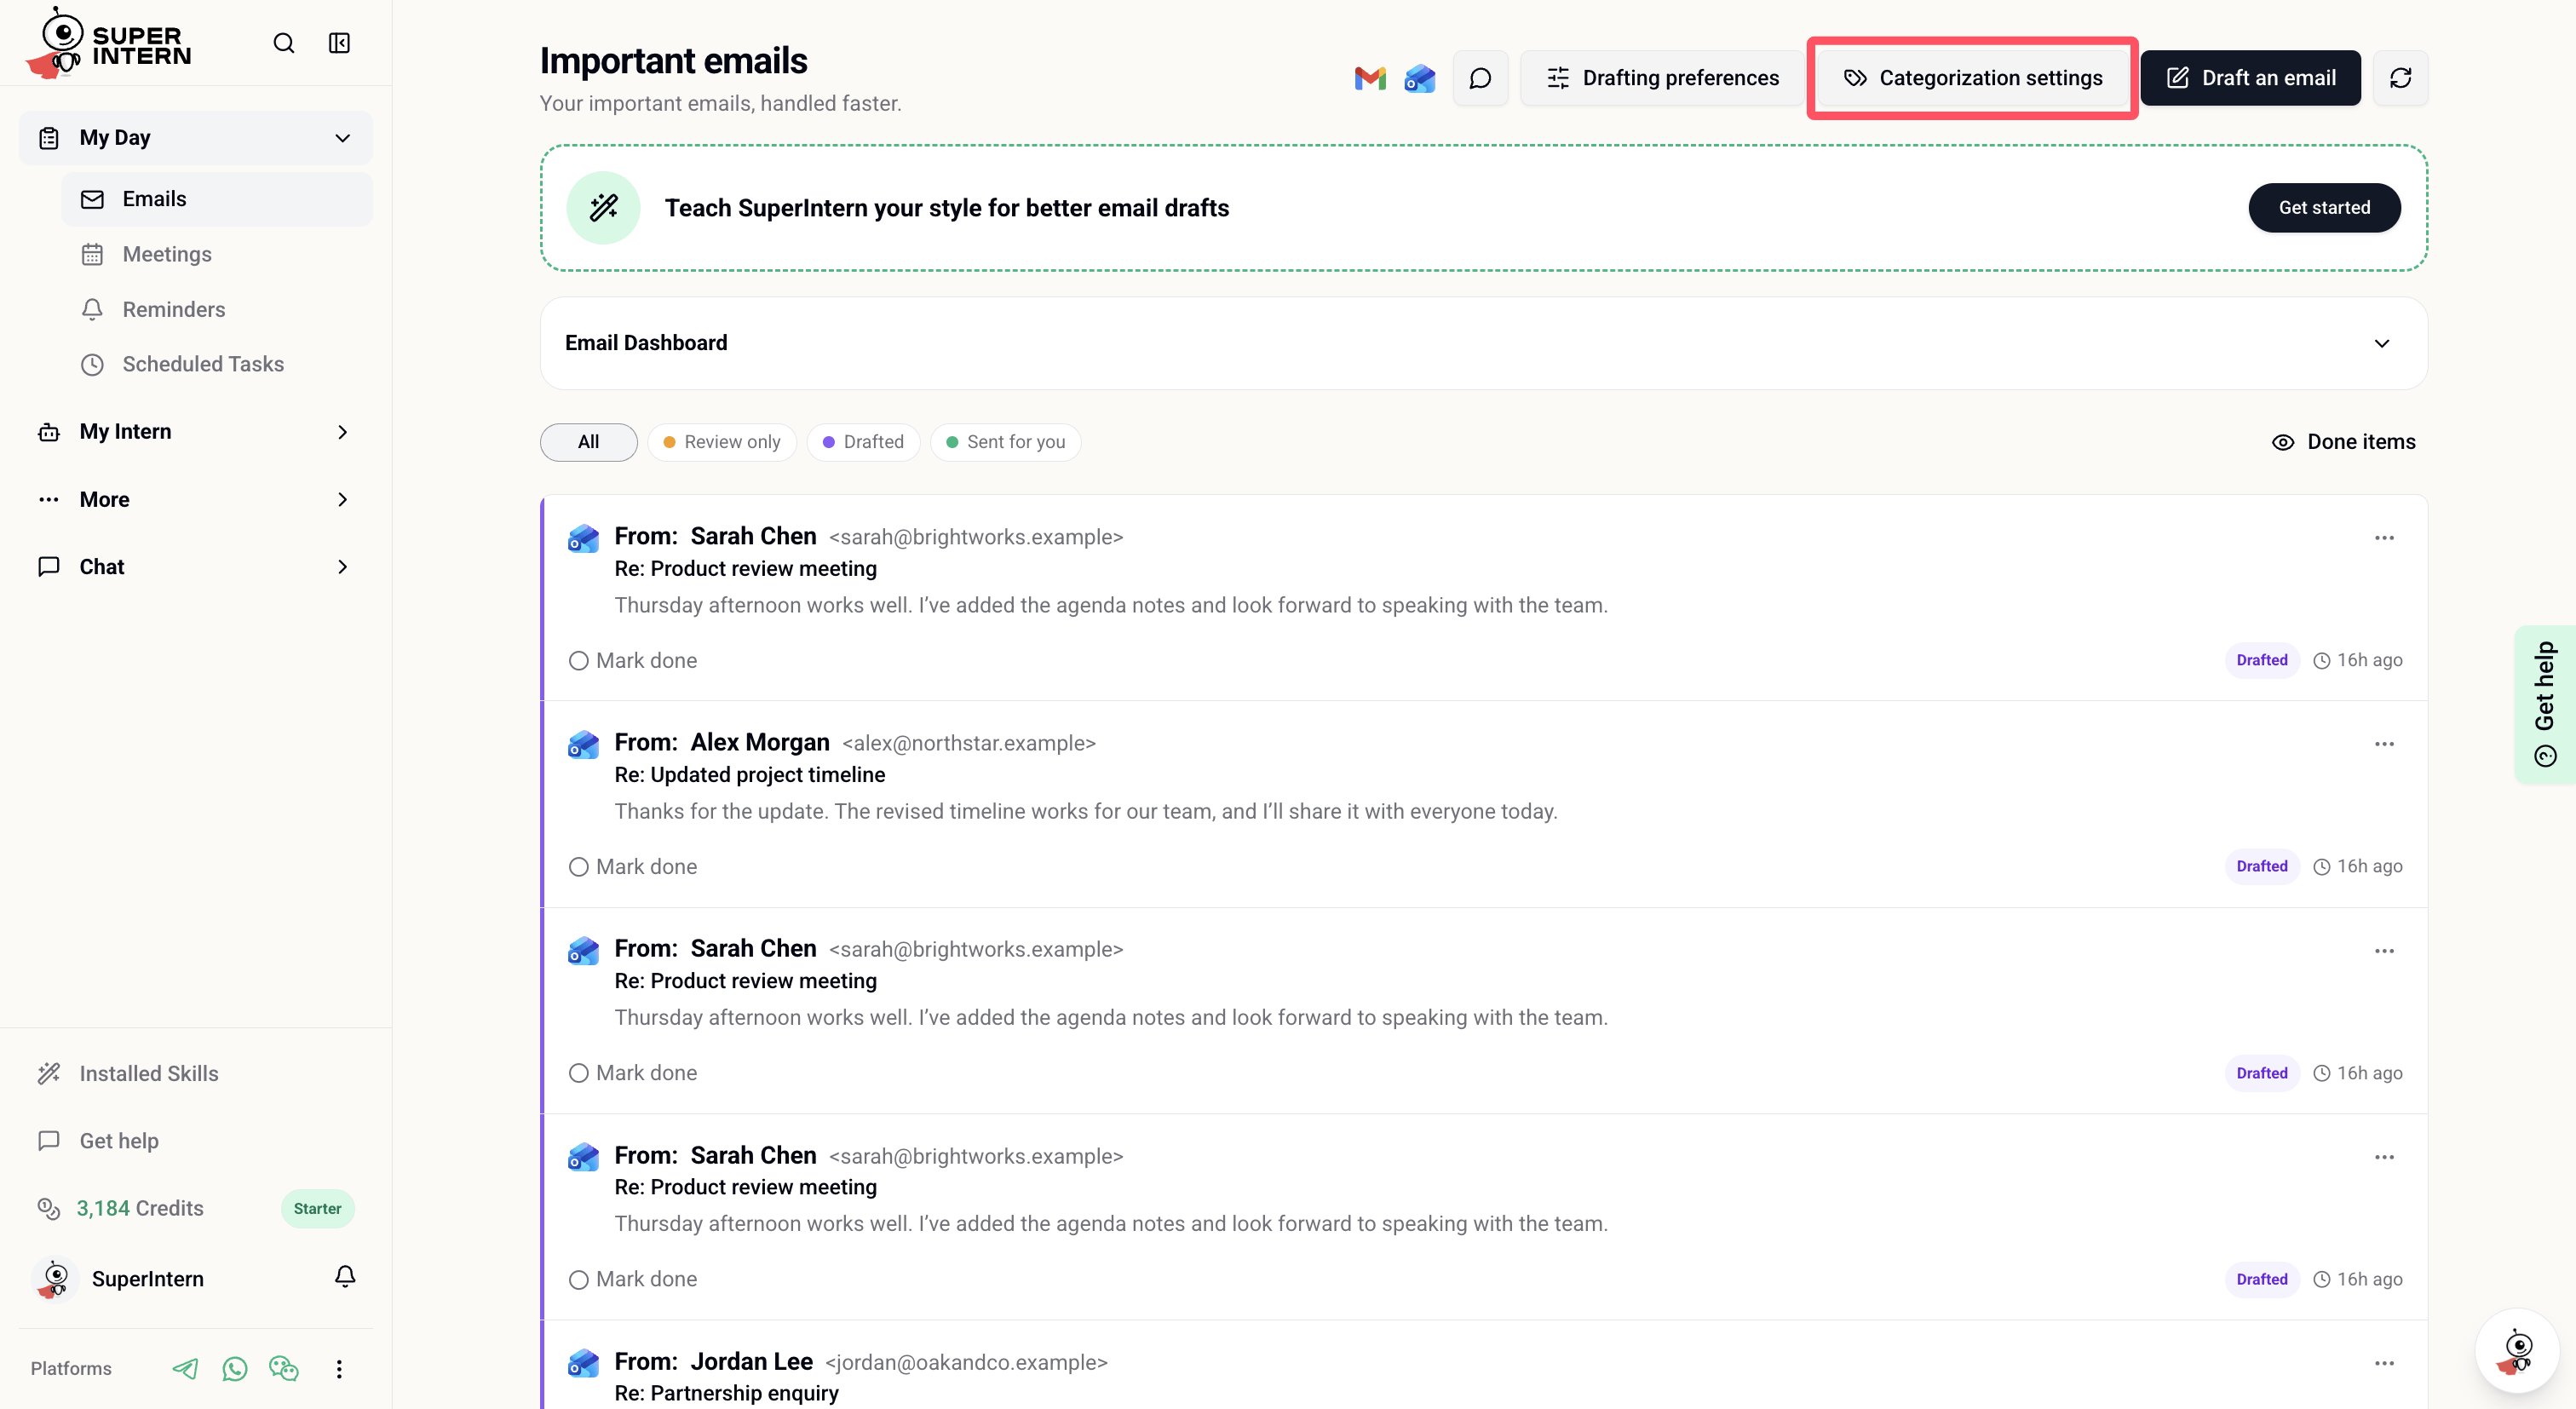
2
Choose your labels
Pick from the preset labels or create your own — a label just needs a name and a plain-language description of what belongs there.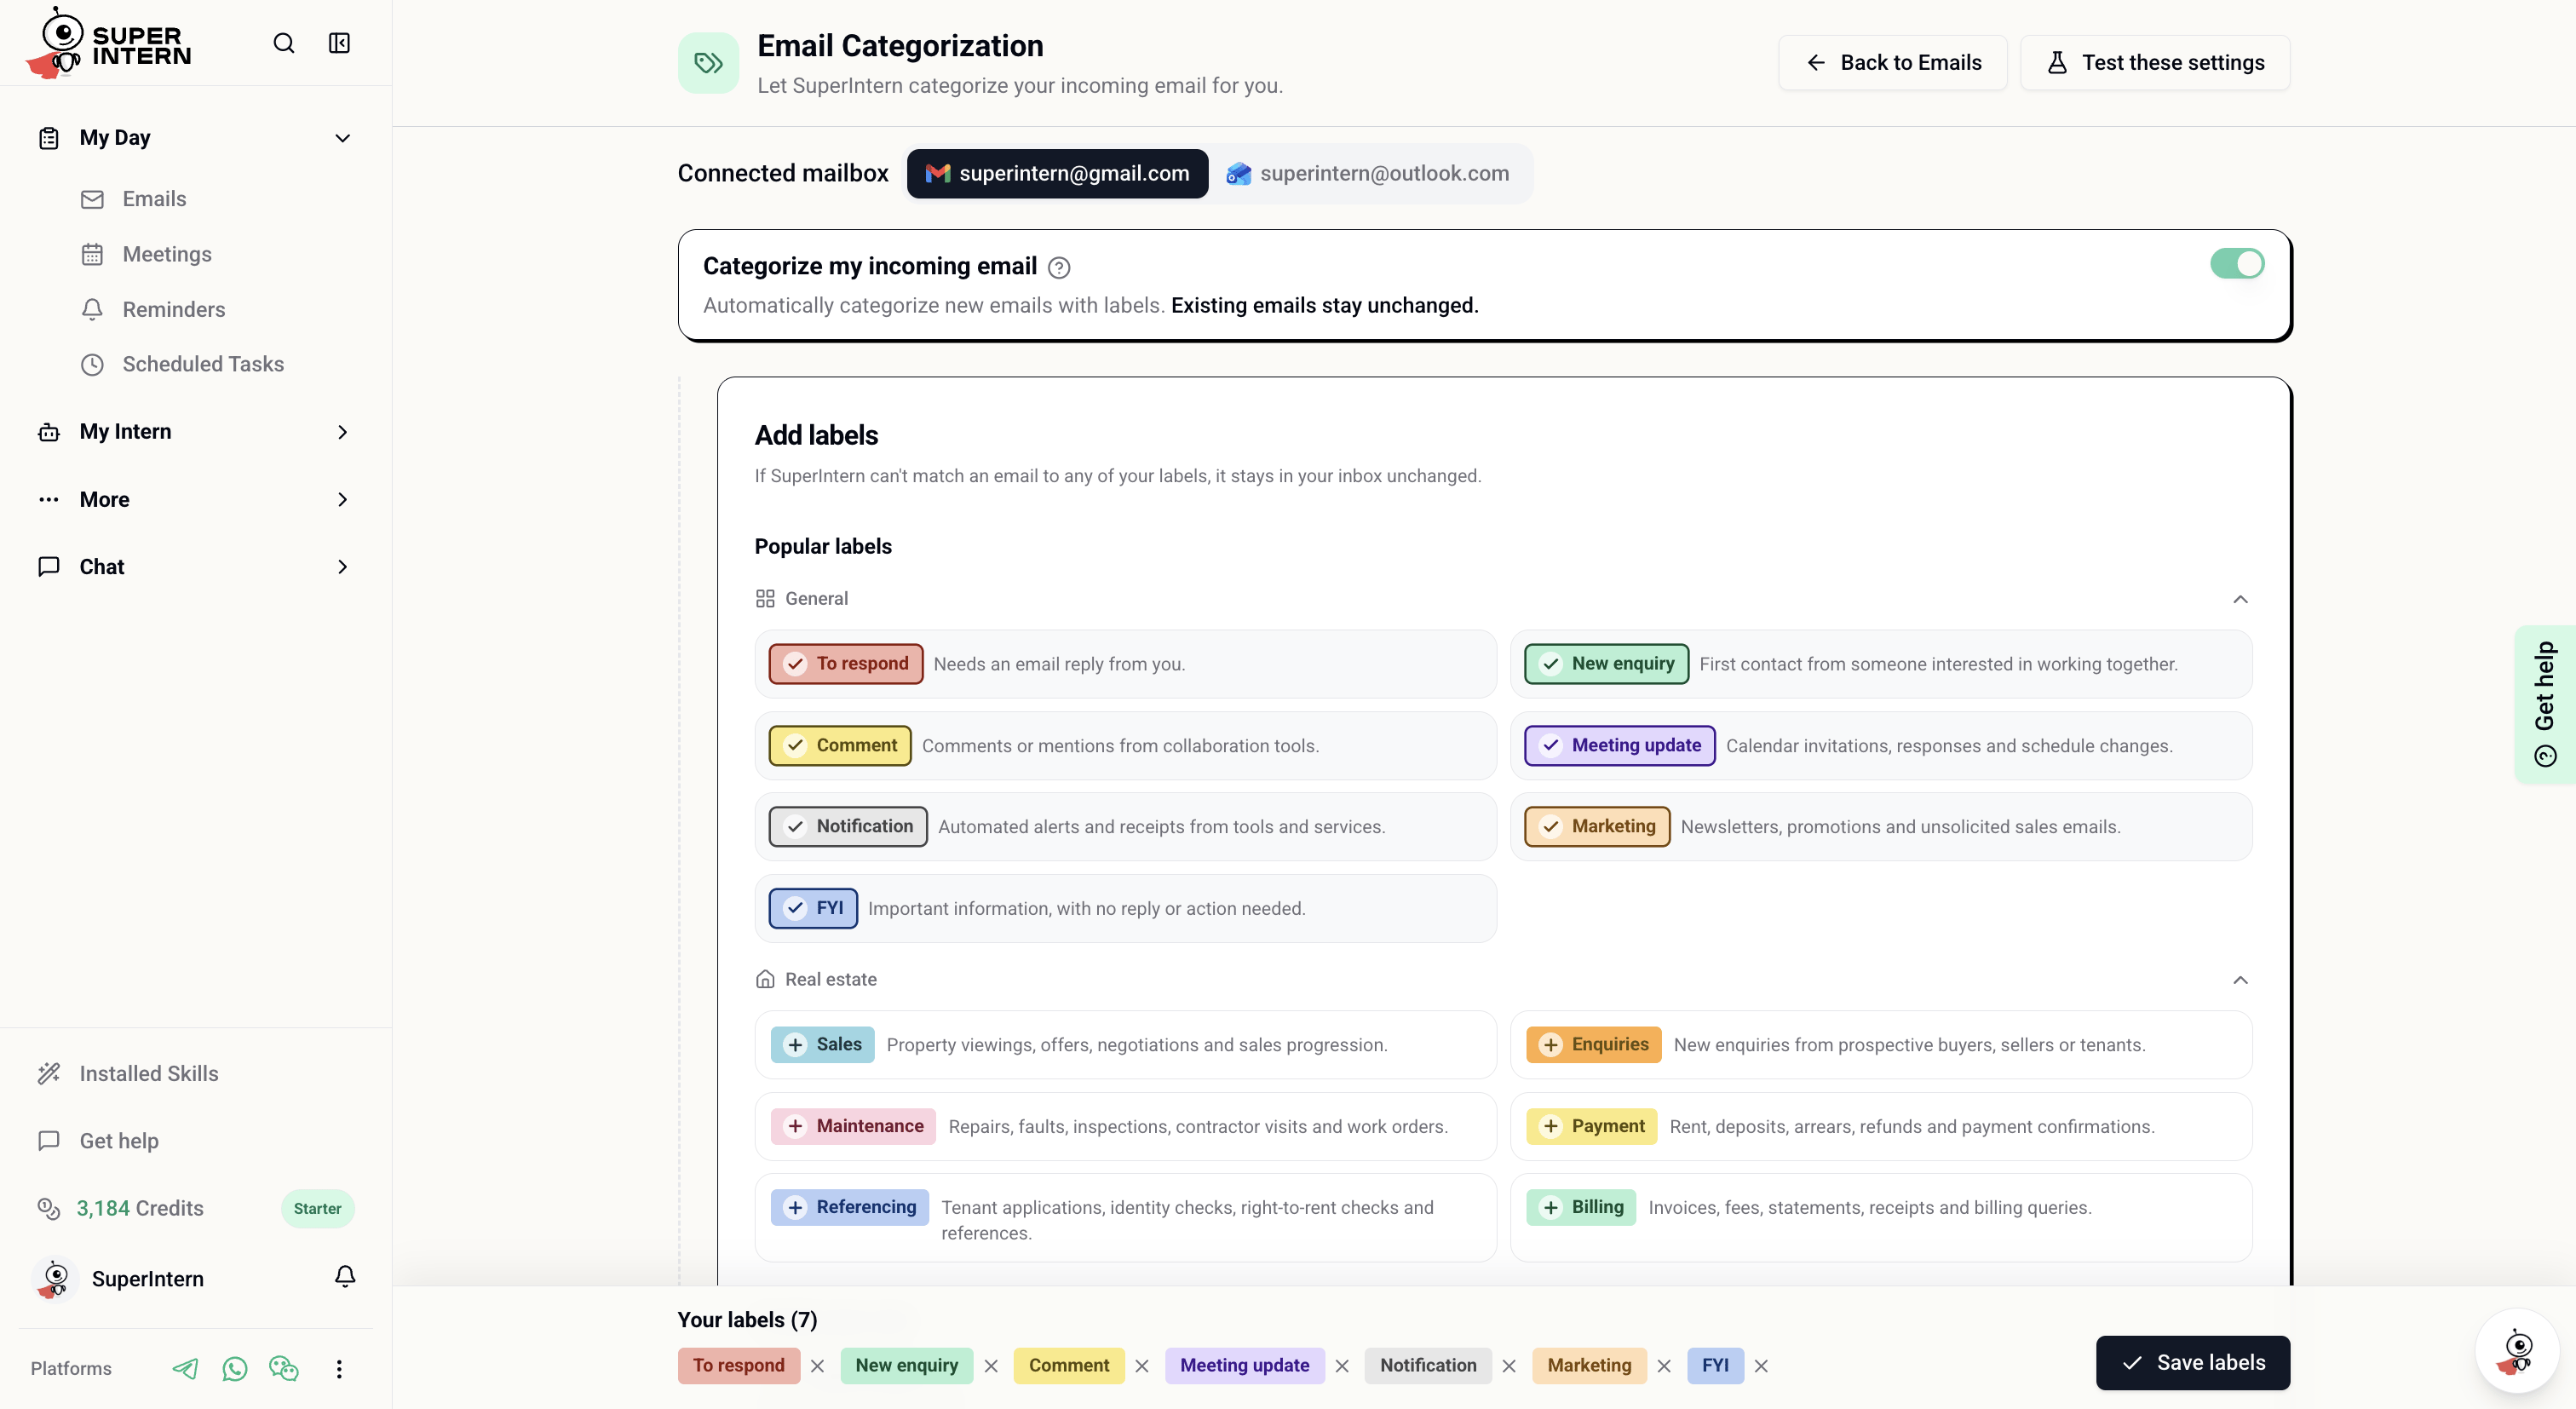
3
Decide where each label goes
Keep matching email in your inbox, or auto-archive things like newsletters and notifications. New email is sorted automatically from then on.
Your First Day, In Five Messages
Copy these into WhatsApp to get set up in a couple of minutes:What’s Next
Chat on WhatsApp
Setup details, voice notes and photos, and what stays in sync.
Drafting Preferences
Reply automation, rules, templates, attachments, and signatures.
Email Categorization
Automatic labels and inbox actions for every new email.
Reminders
Manage reminders and todos from My Day or from chat.